Desktop Environment : Configure VNC Server |
Install VNC Server to connect to CentOS Stream Server with GUI from remote client computer. | |
| [1] | Install Tigervnc Server. |
| [root@dlp ~]# dnf -y install tigervnc-server |
| [2] | If Firewalld is running, allow VNC service. |
| [root@dlp ~]# firewall-cmd --add-service=vnc-server success [root@dlp ~]# firewall-cmd --runtime-to-permanent success |
| [3] | If SELinux is enabled, change policy. |
[root@dlp ~]# vi vncsession.te # create new module vncsession 1.0;
require {
type default_t;
type xdm_home_t;
type vnc_session_t;
class dir { add_name create write };
class file { create open write };
}
#============= vnc_session_t ==============
allow vnc_session_t default_t:dir { add_name write };
allow vnc_session_t default_t:file { create open write };
allow vnc_session_t xdm_home_t:dir create;
checkmodule -m -M -o vncsession.mod vncsession.te [root@dlp ~]# semodule_package --outfile vncsession.pp --module vncsession.mod [root@dlp ~]# semodule -i vncsession.pp |
| [4] | Configure Tigervnc with Systemd Unit like follows. Configure VNC settings on each user first, and next, start Systemd Unit with root privilege. |
# set VNC password [cent@dlp ~]$ vncpasswd Password: Verify: Would you like to enter a view-only password (y/n)? n [cent@dlp ~]$ vi ~/.vnc/config # create new # session=(display manager you use) # securitytypes=(security options) # geometry=(screen resolution) session=gnome securitytypes=vncauth,tlsvnc geometry=800x600 |
| [5] | Configure settings with root privilege and start Systemd Unit. |
[root@dlp ~]# vi /etc/tigervnc/vncserver.users # add to the end # specify [:(display number)=(username] # display number 1 listens port 5901 # display number n + 5900 = listening port #
# This file assigns users to specific VNC display numbers.
# The syntax is <display>=<username>. E.g.:
#
# :2=andrew
# :3=lisa
:1=cent
:2=redhat
# start systemd unit [root@dlp ~]# systemctl enable --now vncserver@:1 vncserver@:2 |
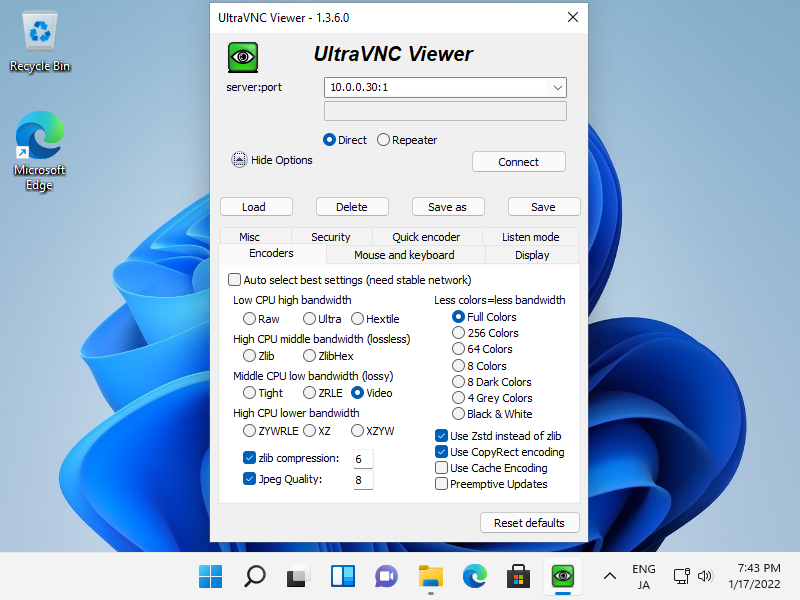
| [6] | Install VNC Viewer on client computer to connect to VNC server. This example is based on Windows 11 and UltraVNC. Download UltraVNC from the site below. ⇒ https://www.uvnc.com/downloads/ultravnc.html After installing UltraVNC, click [UltraVNC Viewer] to run, then, following window is shown.Input [(Server's hostname or IP address):(display number)] like following example and then click the [Connect] button. |
 |
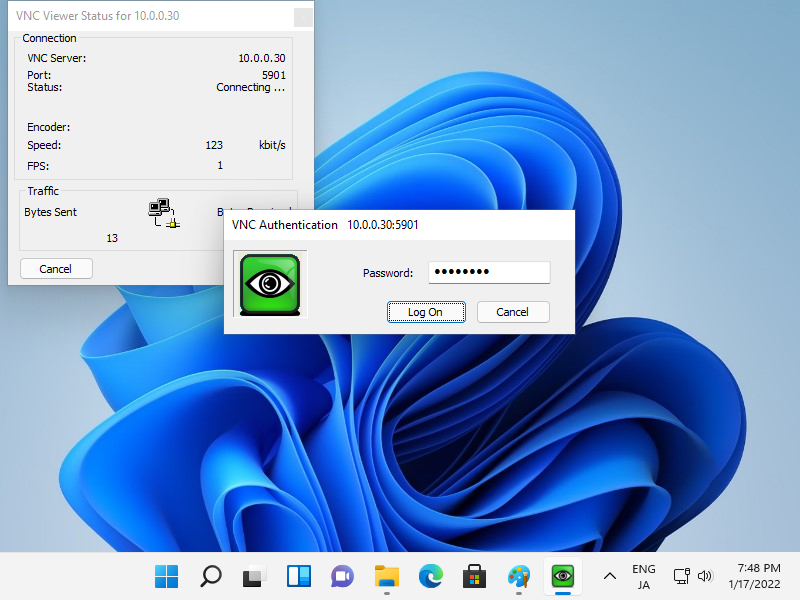
| [7] | VNC password is required to input for authentication. |
 |
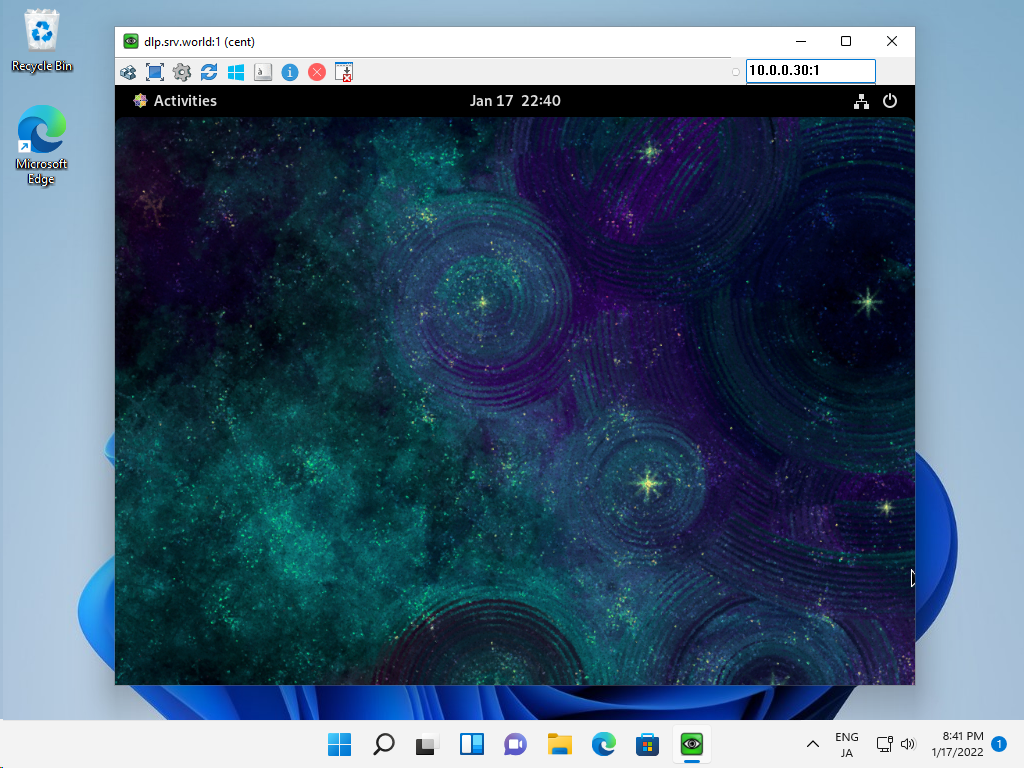
| [8] | If successfully passed authentication, VNC session starts like follows. |
 |
No comments:
Post a Comment